

Although I have been sewing regularly for a few years now and am fairly confident in making tops, skirts and dresses, along with becoming braver with pattern drafting, the one item of clothing that I have not attempted are trousers. There are a few reasons for this. One, I am very bottom heavy, a pear shape if you will, resulting in my avoidance of making anything fitted out of fear it would become far to complicated. Two, not only am I ‘a pear’, I’m also very short – 5 ft 2 inches to be exact. This causes more fitting anxiety for me, to ensure I can scale down the trouser pattern without losing the shape. Of course all these concerns have been floating in my head for a while, making it even harder to take the trouser making plunge. Resistance however, was futile for someone who likes and wears jeans and trousers regularly.
I decided to start with a simple but seemingly flattering pattern, the Ultimate Trousers from Sew Over It .

I liked the fact that the design had a flat front and side zip, which is incredibly flattering on the tummy and avoids bulk that can usually come from a zip or button fly in smart or semi-smart trousers. Also this would be easier to fit and adjust than tackling a fly front for my first experience.
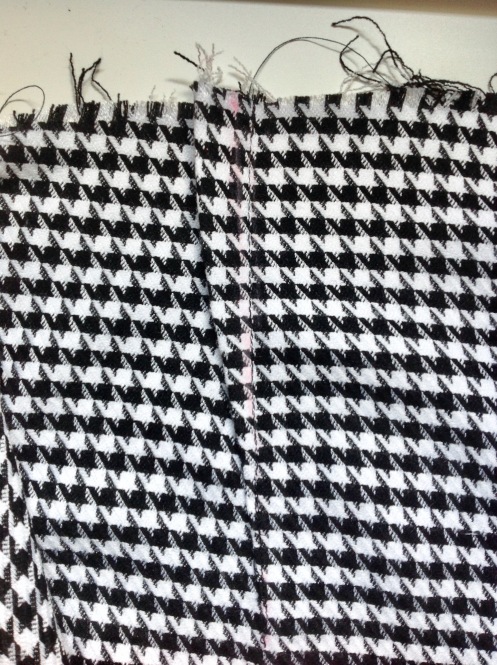
I picked some beautiful suiting houndstooth check fabric also from Sew Over It, in black and Ivory. A classic check and one that could be paired with plainer tops or blouses in a variety of colours.

However, silly me didn’t pay attention to the shopping cart when I ordered online. Instead of buying 2 meters (quantity of 4 as the fabric was sold per half a meter and I knew this!!), I ended up ordering 1 meter by mistake. Doh!! Most of you would have bought more upon realising however, I decided to make the trousers two days before my closest friends 40th birthday party and in my head I knew it had to be that fabric and I had no time to get more – always last minute.com with me!
For the sizing, I needed 1.75 meters, so how was I going to get the pattern pieces out of this meagre amount and still have the `hounds’ facing the same way? Hmm mm, I certainly don’t do things by halves! Fortunately, the wrong side on the fabric looked exactly the same as the right side to the untrained eye, tested on a layman – my husband – who didn’t have a clue! Yes of course I knew there was a difference. The wrong side was softer to the touch mainly and slightly fuzzy if you looked really close. I wouldn’t advise it though as the pattern will make your eyes go really weird! For these trousers, I was prepared to go for it and instead of placing the front and back pieces on the wrong side in the same direction (which I couldn’t do of course), I placed the back piece on the right side of the remaining fabric, the other way up and I just got both pieces, with the waistband, out of the 1 meter. What also helped was shortening the front and back pieces by 2 1/2 inches in order to fit my leg length. Finally a reason for being short!
Please note however, there are no lengthen or shorten lines on this pattern. Trimming the length at the bottom (as suggested in the pattern) would create a wider look at the ankle, which I didn’t want. Instead I shortened it at the short’s line, which worked really well.

In terms of the making of these trousers, please note that Sew Over It patterns do generally come up small and with being bottom heavy, I wasn’t surprised that I was a size much higher than on other patterns I’ve used for dresses and skirts etc. The hip measurement, in line with the waist measurement, must be adhered to. If you are in between sizes go with the bigger size. Better to have more fabric to play around with, than a garment too tight to adjust or wear. Once cut out, I baste stitched the front and the back pieces together, leaving the opening for the zip and leaving out the waistband initially. I tried the trousers on and adjusted the fit accordingly to my requirements, with the opening for the zip pinned closed once the trousers were on.
As there was no stretch in the fabric, I decided to leave a generous amount of ease in my hip and bum area to ensure I was comfortable and also could sit down or dance like a loon without ripping the trousers and causing embarrassment! Even with that, I still had to take in the waist at the sides and the darts to ensure it sat secure on my lower waist, without slipping down, resulting in 1/2 cm taken in at each side of the darts, grading in to the original dart line half way down.
I also took in 1 cm from the back and side seams at the waist to ensure a good fit.

Once I was satisfied with the fit I transferred the alterations to the waistband pieces, before sewing them together and attaching to the trousers and finally inserting the invisible zip.
I’m glad I made the effort to adjust the fit as I now have my first pair of trousers, made by me, that are comfortable but stylish and I know I will wear a great deal. Since making them last Saturday I’ve already worn them twice! The first time was the 40th party as mentioned. However, due to secrecy on the other piece of clothing I made to go with the trousers for that evening (a pattern test that I’ve been doing recently), I can’t show you the pictures just yet. The second time was yesterday for my trip to Borough Market and a meal out in London for my husband’s birthday.

One thing to note, the trousers are designed to come up to your lower waist, which for me isn’t my first choice of waistline as I find RTW low waist trousers really uncomfortable. I have a `big butt and I can not lie’!!!. However, with ensuring you get a good fit by basting first and adjusting as you go, I can assure you a lower waist trouser won’t be as uncomfortable, if you are as adverse to them as I usually am.

My first me-made trousers under my belt (pardon the pun!) and I have to say I’m so chuffed with myself! I realised not to be so scared of giving something new a go, even if you think it will be complicated. Trousers like these are fairly easy to construct once you are happy with the fit and nowhere near as hard as I thought they would be – isn’t that usually the case? I would recommend these as a first trouser sewing project for an advanced beginner, to build confidence and get use to the fitting process. I can’t wait to make some more casual and smart trousers and build up to making jeans, now that’s the ultimate trouser goal!
Here’s a few more photo’s of me enjoying my trousers!!


Brilliant Sarah – love the photos too good job done the really suit you – did you make the top too? Xxx
LikeLiked by 1 person
Thank you so much! I really like them and pleased I gave them a go. The top is from River Island but have a SOI Anderson blouse to make in a lovely mustard soon that would team up with these well. Xxx
LikeLike
They look great 😄
LikeLiked by 1 person
Thanks Debbie, pretty pleased with them for my first go! Definitely more on the horizon now. 😊
LikeLike
They’re brilliant and even more so when you realise just how little fabric you were working with! Great job!
LikeLiked by 1 person
Ah thank you it was a test of resolve and sheer stubbornness that got these made! Should apply it to all my makes under pressure! 😂
LikeLiked by 1 person
These trousers look awesome, love your whole outfit 😍 I’ve always been the same, scared to try them but you’ve convinced me that I need to step outside my comfort zone.
LikeLiked by 1 person
Ah thank you!! Go for the trousers Lynsey you won’t regret it. If I can make them anyone can! Xx
LikeLike
These are really lovely! The colour of the fabric goes so well with your whole outfit.
LikeLike
Thank you 😊 I do like this fabric and they are nice and comfy too!
LikeLike